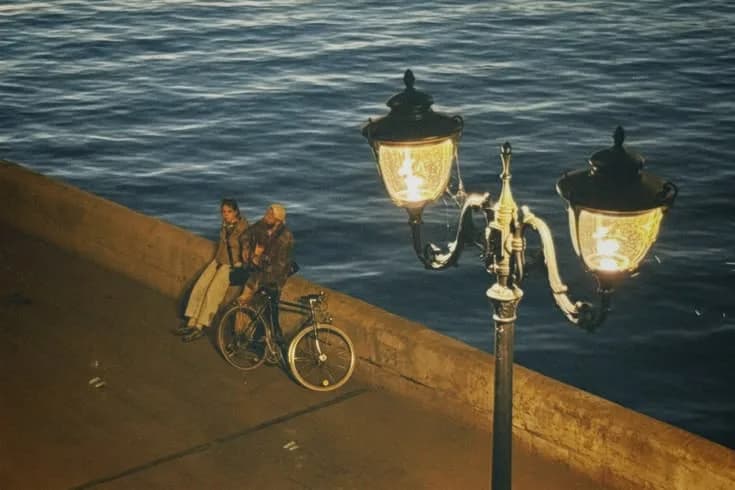
Vanishing point composition explained
How converging lines create depth, where to place the point, and when to use perspective.


A vanishing point is the spot where parallel lines appear to meet as they recede into the distance. In vanishing point photography, you place that spot deliberately in the frame so roads, rails, hallways or rows of trees pull the viewer's eye deep into the picture. It creates depth, anchors a sense of scale, and is the engine behind some of the most striking street, architecture and landscape photos you have seen.
In vanishing point photography, the rule is simple: find a set of lines that run away from you, and let them converge on a single point you place deliberately. Here is how to do it well.
Why vanishing points create depth so easily
When parallel lines converge, your brain reads the scene as three-dimensional. That is how perspective works in real life. A photograph that repeats this cue feels deeper than a flat scene, even though the image is still two-dimensional.
The stronger the convergence, the stronger the depth. Roads, rails, hallways, fences, and rows of buildings are the classic sources.
How to find a vanishing point
Look for any repeating edge that runs away from you. Then change your position until the lines clearly converge.
Good places to look:
- Streets and alleys, where curbs and buildings converge.
- Train tracks and roads that disappear into the distance.
- Hallways, tunnels, and colonnades.
- Fences, hedges, and rows of trees.
- Riverside paths and piers.
Walking a few steps left or right often turns a messy scene into a clean convergence. Our guide to leading lines covers the related idea of edges that guide the eye.
Where is the vanishing point located?
In a photo, the vanishing point is located where the converging lines would meet if you extended them. In a one-point perspective (looking straight down a road or hallway) it sits on the horizon, at your eye level, directly in front of the camera. Raise the phone and the vanishing point moves down the frame; lower it and the point moves up. Step left or right and it slides sideways. That is why your position, not your settings, decides where it lands.
A quick way to find it: trace two parallel edges (two kerbs, two rails, the top and bottom of a wall) with your finger on the screen until they cross. That crossing is the vanishing point.
Where to place the vanishing point
This is the compositional decision. The vanishing point is a strong point of interest, so treat it like one.
- Center it for symmetry and a sense of calm and structure. This works beautifully for hallways and formal architecture.
- Put it on a third line for a more dynamic, less rigid image.
- Put it low to emphasize the sky and make the ground feel vast.
- Put it high to emphasize the surface you are standing on, like a road or a patterned floor.
If a person or object sits near the vanishing point, even tiny, it becomes a natural focal point because the lines point straight at it.
Combining vanishing points with other techniques
Vanishing points play well with other composition tools.
- Add a layered foreground so the eye travels from near to far in clear stages.
- Use the two-thirds focus rule to place your subject lower and let the lines climb.
- Watch reflections. Wet streets double your lines and deepen the effect.
Aerial and one-point perspectives
There are variations worth knowing. A one-point composition has a single vanishing point and reads as orderly and direct. A two-point composition has two, often for building corners, and reads as more dynamic. An aerial perspective looks down from above, where the scene flattens and scale becomes the subject.
slay includes vanishing point, two-point vertex, one-point vertex, one-point aerial, and aerial triangle guides, so you can line up these perspectives on the live viewfinder instead of guessing.
Common vanishing point mistakes
- Letting the lines exit the frame early. If your lines run off the side, the eye escapes with them. Aim the convergence into the frame.
- Cluttering the convergence. Anything messy at the vanishing point weakens it.
- Forgetting the horizon. A crooked horizon fights the perspective. Keep it level when the geometry is the subject.
- Shooting too high or low by default. Bend your knees or raise the phone. Perspective is a position problem first.
A one-point perspective walkthrough
Find a hallway, a bridge, or a road that narrows into the distance. Stand square to the direction the lines travel, then raise or lower the phone until the converging edges meet at a clean point. Move a step left or right and watch how the point shifts. When the convergence sits on a third line, take the shot.
Try it again with a person walking far ahead. The tiny figure near the vanishing point instantly becomes the subject, because every line in the frame points at them. This is one of the most reliable ways to make an ordinary scene feel intentional, and it takes only a minute to set up.
Frame it perfectly, every time
slay overlays vanishing point, two-point vertex, one-point aerial, and 11 other guides on your live camera, so the geometry lines up before you shoot. Free to download, with optional Slay Pro.
Get slay on the App Store: https://apps.apple.com/app/id6807513456?utm_source=slaycamera&utm_medium=article&utm_campaign=vanishing-point-photography
Questions about this article
Quick answers from the article. Ask anything else below — the assistant answers from the app's docs.

Frame it perfectly, every time.
Free to download. Slay Pro from $1.99/week unlocks every guide, LUT and lesson.
Download the App